When creating website content, it is important to review both your own and others work before publishing it.
Reviewing content
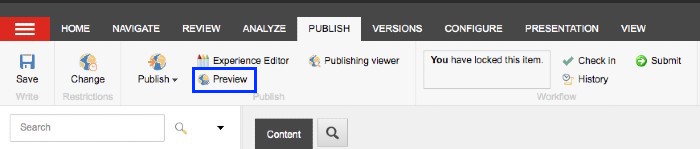
You can get a preview of what your page will look like on the website by saving your work and clicking the ‘preview’ option in the ‘publishing’ tab.
This will show you the layout of the content on the page, making it easy to see if there are any changes that need to be made.
We recommend that you send your content to someone else to check over, as it is easy to miss mistakes in your own work. If your colleague is a Sitecore user, you can share the link to the preview page.
If you are finished making changes on an item but do not wish to publish them to the site, click ‘check-in.’ This keeps the changes you have made to the page but unlocks it so another user can edit.
Workflow and Publishing
The ‘workflow’ tells you what stage a page is at for its template type. The workflow options can be found in the ‘review’ tab. These will change as the page moves through the workflow stages.
Any new pages or amends will not be visible on the live site until they have been reviewed and subsequently published.
Depending on your account settings, you will be able to publish your page or it will be sent to someone else for approval.
When you create or edit a page, it automatically enters the ‘draft’ stage of the workflow. It is locked to your Sitecore user account to prevent someone else working on it an overwriting your changes.
We advise that you work in the “draft” stage and preview your work whilst you are editing and creating content. When you are ready to publish to the website, feel free to chat and preview with your team prior to publishing.
Press ‘save’ in the ribbon when you are happy with the page. Click ‘submit’ on the ‘review’ tab.
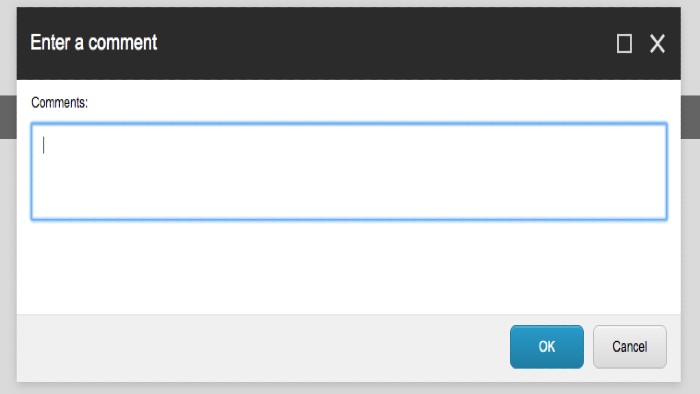
Add a comment about the change if needed, and select ‘OK.’
This will enter the ‘awaiting review’ stage. The page will be sent to a publisher for approval if you are not one.
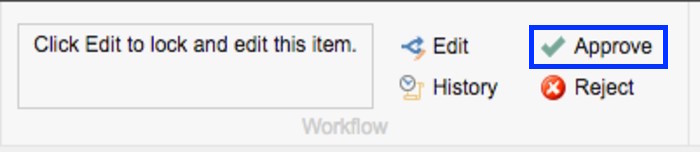
They can ‘approve’ the page and publish it to the website or ‘reject’ it if there is an issue. The page will return to the ‘draft’ stage with comments on what needs to be changed.
To publish the content to the website, select ‘approve’ in the ‘review’ tab. Again, you can add a comment about the approval if needed, and select ‘OK.’ These changes will then be published to the website.
Publishing order
When ready to put a page live it is important to publish a page and it's component in a certain order to ensure they appear correctly on the website.
It is recommended to publish a page through the content tree rather than the experience editor so that you can publish the page items in the following order:
Publish the page
Publish the datasource folder
Publish the components within the datasource folder
Make sure you publish items in descending order from top to bottom, this includes the components.
View your page on the web to check that the page and its component elements have published out in full. The workflow gutter icons can be a good indication that a step has been missed in the publishing process.