Making Notes and Links in Your Mind Maps

Making Notes and Links in Your Mind Maps

Mindview can be used as a hub where all research and ideas can be linked to. You can do this using the following methods:

These options are highlighted on the toolbar below.


Make a Text Note

The Text Note editor can be used for typing ideas for your project or essay, which can you can use as your starting point when exporting to a Word document.

Press on the branch you want to attach the text note to, select the Home or Insert ribbon, and now press Text Note and start typing in the text note editor.

MindView interface with the text note option in the toolbar highlighted with a red box and the text note editor open at the bottom of the page

Go back into the mind map and the text note will now be saved under the paperclip on the chosen branch.


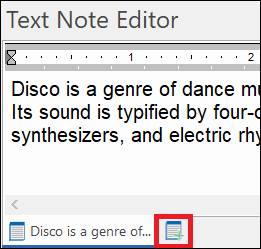
You can add multiple text notes to a branch by selecting a new text note under the text note editor.


A zoomed in picture of the text note editor in MindView with the  new text note icon highlight with a red box


Back to top


Hyperlink


Use the Hyperlink option to link to your research. Select a branch and press on Hyperlink.


Then paste the URL of the webpage you want to link to and name the link.

MindView interface with the insert hyperlink dialogue displaying

After you have pressed the OK button a paperclip symbol will appear in the branch you have selected.


When you hover over the paperclip the named link will appear. Press on it to go to the web page.


You can have multiple hyperlinks per branch.


Back to top

File Attachment

Press on the branch that you want to link the attachment to then press on the Attachment tool.

The MindView 'open' dialogue that allows you to navigate to a file to attach it to a mindmap

Locate and select your file to link it to the selected branch. This will then appear under the paper clip in that branch. Hover over the paperclip to list attachments and left click to open.

Back to top

Capture

With the Capture tool you can grab information from the web, and reference it properly later.

MindView toolbar with the capture option on the right side highlighted with a red box


Firstly, in your web browser, find the web page that you want to capture the information from. 


Now select the Insert ribbon and press Capture. Mindview will now minimise itself and you will then be switched to the web page you have previously loaded.


A small menu will appear on screen, which will ask you to choose to capture a PictureText or Audio.


Using Picture, you can capture images to send to your mind map.  There is also an OCR function so you can screenshot an image containing inaccessible text, such as those found in journal articles, and then convert this to accessible text.


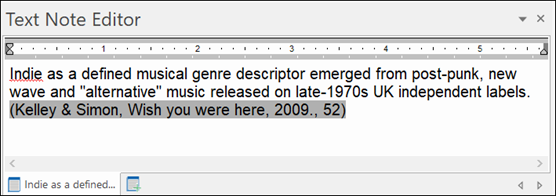
Using Text, you can capture a selection of text and send this to your mind map.  It will also include a citation to support your referencing.


Using Audio, you can record a voice note that can be added to your mind map.

The capture dialogue in MindView with the options image and text

Capturing an Image

Pressing the Picture button will dim your screen and turn your mouse pointer into a crosshair.  Now, draw around the area of the screen you want to capture. The image will be captured.

This feature is very useful for capturing inaccessible text from eBooks, or for capturing images and diagrams from PDFs.


Once you have selected the area of the screen to capture, the Preview window will appear as shown below:

The preview dialogue in MindView previewing an image capture. The title and URL fields populated.

You have options to crop, rotate or flip the image.  You can also use the OCR option to convert any text inside the image into fully accessible text.


When logged into MindView with your user account, all captured information will be put into the Research folder.  You are given the option of selecting which research folder and also colour-coding the information.


Once you press the Save button the image will be sent to the Research panel in MindView.


Image showing captured information in the research panel


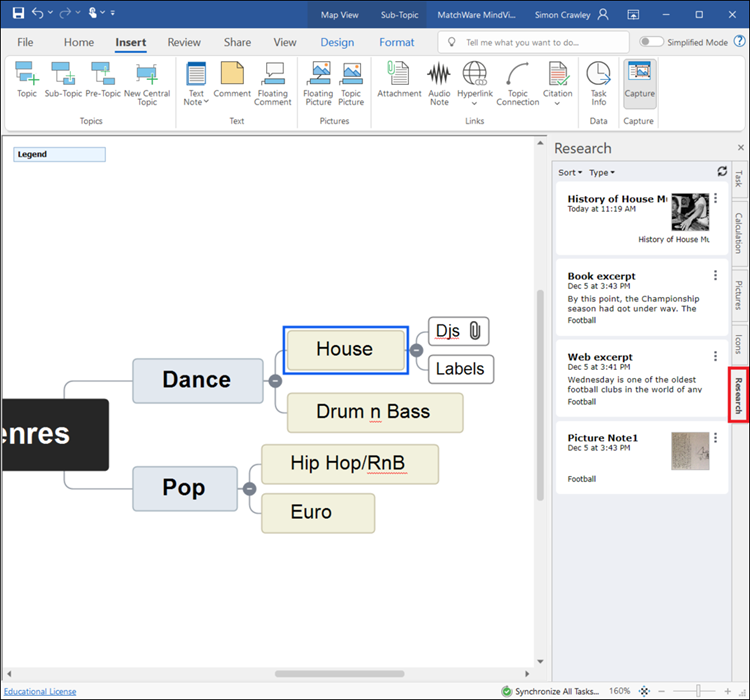
Select the branch you want to add the captured image to, then hover over the entry in the Research panel.  You will see an Add button


Image showing the add to map button in the research panel


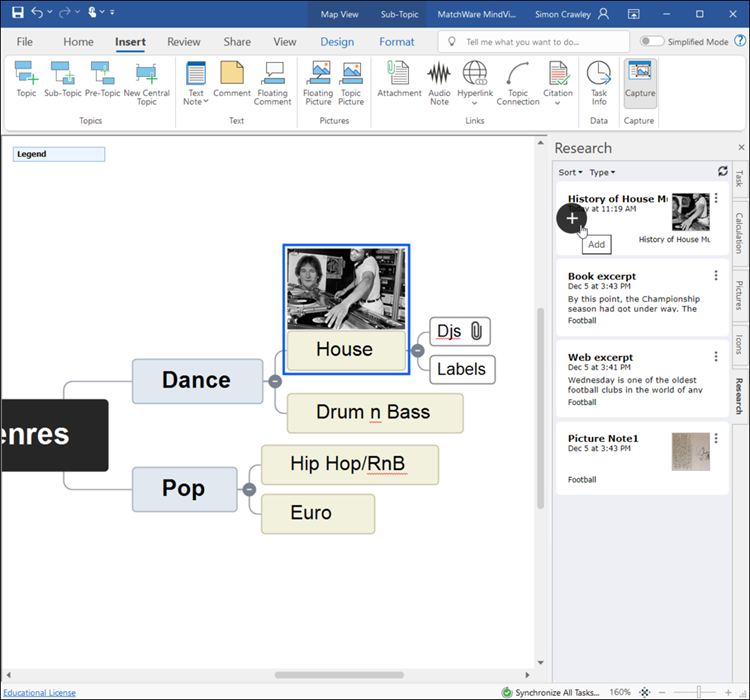
Click Add to copy the entry across to  branch.

The web address associated with the image will be added to the source list (see Citation tool below)


Please note that if you are not logged into MindView with your user account, you will not have access to the Research panel.  Captured information will be added directly to the currently selected branch in your mind map instead.
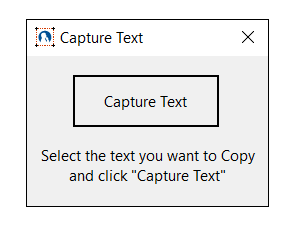
 

Back to top

Capturing Text

Press the Text button in the Capture menu. The box will now change to say capture text.

The capture text dialogue in MindView

Now select some text in your web page and press Capture Text. The Preview window will now appear.

The preview text dialogue in MindView with a preview of the captured text.

You have the option to clear all formatting from the selected text, along with choosing the research folder.

Once you press the Save button the text will be added into the Research panel in MindView.

MindView interface with the text note editor displayed at the bottom of the page with the captured text

However over the entry and click to add to the selected branch.  It will also add a citation. 
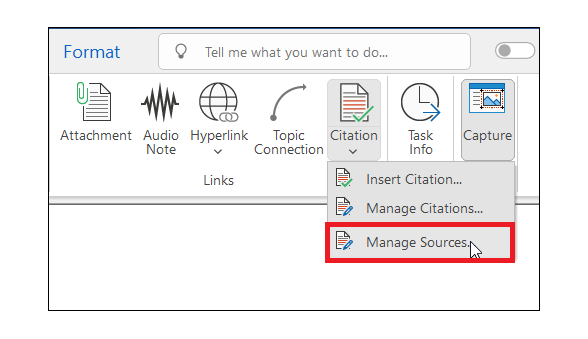
You can access the source list by selecting Manage Sources from the Citation tool menu.


MindView toolbar with the citation option expanded and the manage sources option highlighted

You can now see the sources you have captured. 


Menu showing sources captured after using the Capture tool

Press on the Edit button to review your sources.

MindView sources dialogue with the existing sources listed. The edit option is highlighted with a red box

Back to top

Mindview Assist (mobile app)


You can also capture information using MindView’s mobile app called MindView Assist (downloadable for both Apple and Android)

You can use the app to:

  • capture text from web pages
  • record videos
  • create audio notes that can be transcribed
  • take photos
  • Scan text from book pages

All of this, along with original source information, can then be inserted into your mind map from the Research Panel, so you can keep researching and building your mind map whilst away from your computer.  


When you have installed and loaded MindView Assist, you can toggle between the Tasks and Research screens, using the buttons at the top of the screen.  Click Research, then press the Plus (+) button to add a new research note.


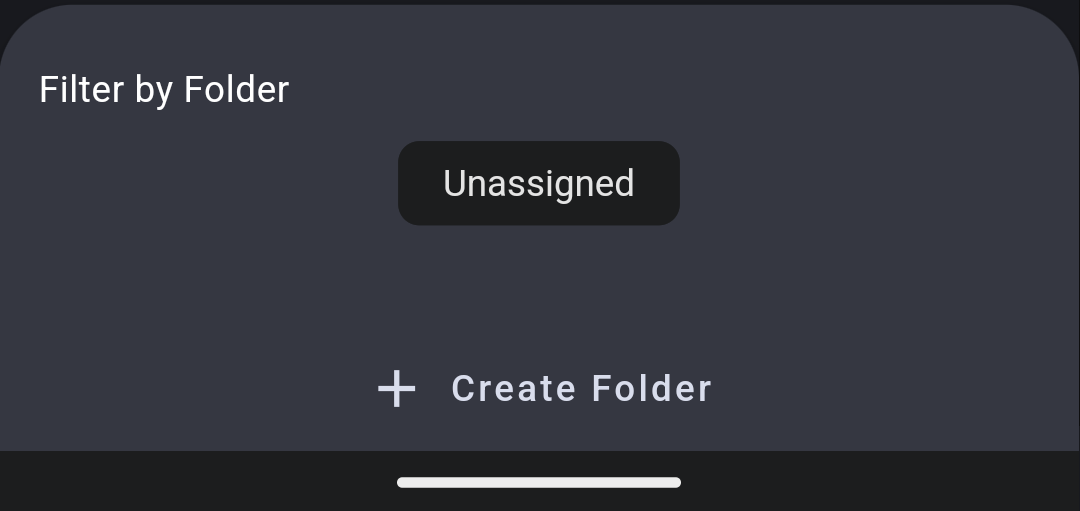
You can also organise your research into folders, which you can create or move between as needed. Press the folder button to see all your folders, including an "unassigned" option for research not yet sorted.


You can move a piece of research by selecting it and then choosing an existing folder, or by creating a new one.


buttons for adding to or creating new folders
home screen screenshot


To capture text from a web page, select and copy the text from the online source and then go to MindView Assist. Press the Plus button on the bottom right-hand side of the screen.

Press the Text button and then paste the text into the New Note window.  Press the tick to confirm.


screenshot of pop up menu
pasted text from web page

From the screen that appears, you can give the information a title, select a folder to save it to, along with adding the source information for reference purposes.  Press the tick to complete.


adding annotation to research piece

To add an image from your camera (for example, to capture text from a book) press the Plus button and then press the Picture button. The app will now open your camera.


Once you have taken your picture, you will then have the option to save the image with a name and source information to a folder.


To extract text from the image (so it can be accessed in the text note editor in MindView) press the OCR button. You can now save the text as a separate research note.


OCR option button


When you use MindView Assist to gather information for your mind map, the sources will be added to the source management list in MindView. This happens automatically when you drag research items from the Research tab into your mind map.


Back to top

Citation

Mindview can not only create source lists from captured information, it can also create sources for physical books and journals. You can then use the added sources to create citations in your Mindview notes.


First select the branch you want to attach the quote or excerpt to, then type in the Text Note editor.


Whilst in the Text Note editor, open the Citations menu in the Insert ribbon and select Manage Sources. The source list will now pop up as before, but instead of editing existing sources we are going to add a new source. Press on the WorldCat button. WorldCat is an online database of scholarly sources.

The MindView source dialog with the add new option highlighted with red square

You will now be taken to a new menu. Search for your source in the search box at the top and press the Search button. The list of sources matching your search criteria will now display below.

Add new source dialog in MindView with all the sources from the search 'indie music scene' being shown

Press the Select button for your chosen source. You will now be taken to the manual entry mode to check what is included in the source, which can be amended if needed. When you’re happy with your selection, click the OK button and the source will be added to the main list.


Make sure that you are still in the Text Note editor and go to the Citations menu in the Insert ribbon. Now you can choose Insert Citation.

Citation option in the MindView toolbar expanded and the options insert citations, manage citations and manage sources highlighted with a red box

Now choose your source. Type in the page numbers if required and click on the Insert button.

Insert citation dialogue in MindView with the existing sources listed and the bottom option selected

You will now see the citation has been inserted under your text in the Text Note editor, and will now be included in the bibliography when we export to a Word document.


Text note editor in MindView with the previously added citation highlighted